CHASSIS REPAIRS
- Piccolo and the ROSE

- Nov 24, 2016
- 2 min read
When everything was entirely stripped from the frame and the chassis, it became evident that there was need for a few bits of welding needed. We arranged for a friend of ours who had experience in this field, to come and re-enforce a few spots. One spot actually had a crack in the steel and the other couple of spots had already been repaired at some stage, so we asked him to repair and replace, so it would be stronger. After Werner had done his job, we re-sandblasted and re-painted the chassis, so we were ready to begin the rebuild.


10 Steps Forward — 5 Steps Back
After closer scrutiny, the general consensus was, the chassis needed reinforcing to maximize its strength and longevity, so, back to the drawing board we went. And decided to have a ‘C’ section welded into the existing ‘C’ section, which of course cost us a bit more money and time, but well worth the effort and we now know the chassis is as strong as can be and will withstand many a year of use and reasonable abuse that any rough road may deliver.


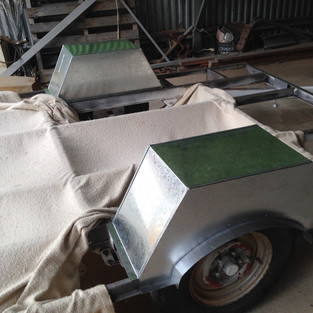
New galvanised steel wheel arches were made by a local steel fabricator, to replace the brittle plastic wheel arches that were originally there. Once they were positioned in place, we cut out the new 17mm ply flooring. We chose not to use marine ply as were advised it would be too weighty. Once cut, we coated the underside with a rubberised water sealant, to protect it from the pending elements, that every van has to deal with.


It is probably worth noting here, that we positioned the frame on top, so as to maximise the length of the flooring, so it would occupy every available centimetre and needed to join two sheets for better coverage. You may notice in the original vans, the flooring seemed to stop a little short of the curved aluminium at the front and the back, thereby allowing a real dirt, dusty catchment area for all kinds of bits and pieces to fall into.


Comments