MASTERCHEF KITCHEN
- Piccolo and the ROSE

- Aug 28, 2017
- 2 min read
WARNING: This is a BIG blog entry because this was a BIG part of the Reno.
A roll-out kitchen was always planned for Piccolo Rose, but many interruptions apart from a few delightful escapes in her had stopped those plans becoming a reality. However the time had now arrived! Mass planning and strategising had taken place, especially how to create the optimum tracking system and space utilisation.


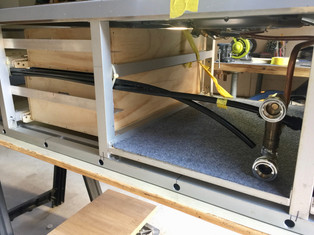
Carl machining the spacers that he placed along each side of the tracks on which the kitchen rolls in and out. Great trouble was taken to keep weight low without compromising rigidity unduly. So aluminium was used for the basic frame and tracks, which was carefully insulated from the stainless steel to prevent corrosion arising when dissimilar metals come in contact.
Please click on the slideshow arrows on the following pic to see even more pics of the construction.


Carl fitting the SMEG 2 burner gas cooker and positioning the sink as well.


Please click on the slideshow arrows on the following pic to see details of the drawer construction. Strong, but light ply was used to keep the weight low.
The stainless steel bench top is amply supported by a sheet of 10mm ply, shown in the slide show below.
The kitchen sits just behind the axle so care was exercised to ensure little Piccolo Rose would travel safely on the roads. She is a well balanced lady.


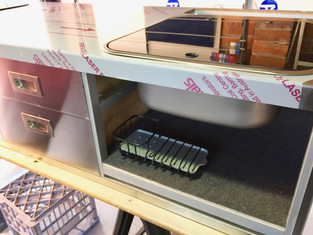
Drawers and compartments were lined with marine grade carpet which we sourced from Bunnings and glued it in place with contact cement.

Plumbing done for both hot and cold water using 12mm 'John Guest' push-on fittings. Not cheap!


This rectangle compartment is for storage and will remain inside the van when kitchen is extended.


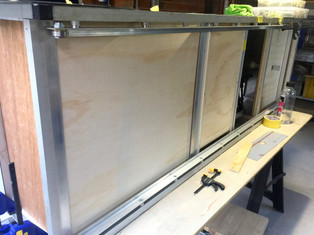
Stainless Steel top was cut to precise measurement, folded and corners welded, by a local steel fabricator. The drawer fronts and door fronts.

The small recess in the left pic below is positioned at the back of the roll-out kitchen and is the inlet for the gas and hot water to the kitchen. It also connects to the pop-up shower.


Even thought the drop-down cupboard doors and the lid for the rubbish slot, behind the sink are yet to be fitted, it is time to slide this beautiful piece of work into its home. A very satisfying moment indeed! NOTE: It had been trialed quite a few times before this final installation.
There will be another blog entry about the kitchen when it is fully completed.


It is slightly difficult to see the context of the following pic, but it is showing the kitchen in all its glory, in the cavity underneath the lift up bed.

Another pic taken of the kitchen parked under the bed with its doors finished and all complete now.


50 x 12mm, sealed ball-bearing races carry the load effortlessly. Dual, flexible hose plumbing allows cold water to the kitchen from the mains and/or 12volt pump, and also hot water from the external gas heater back into the interior sink.


Comments