YES — A WHITE PICKET FENCE
- Rosalie

- May 14, 2020
- 3 min read
Updated: Dec 16, 2020
A few months ago as Carl was having yet another one of his surgeries, I found myself cruising the internet, as you do! I felt super excited to stumble across a used hardwood picket fence for $50 per panel and decided it was a 'must - have' item. Exactly what we needed for our little cottage. I imagined a tidy up and a 'lick' of paint and 'Voila'! But NO...... not that simple!

It's a shame that the pics don't really show just how much work has gone into creating our NEW fence. Honestly it has been a real marathon. Because we have a level block of land I thought we could simply adjust each panel to suit our needs which would include only minor adjustments.
The day finally arrived in the long lists of jobs, when it was time to erect a front fence along our boundary. We studied each existing panel and decided all we needed to do was to cut a few inches off the bottom where some of the palings were rather shabby. As we lay the first panel on the saw stools and began that process, it soon became evident that the previous owners of the fence must have had the fence erected on a slight hill. All the palings were not perpendicular to the rails. Oh dear!!! What now?
The following pic is the original fence in its original location.

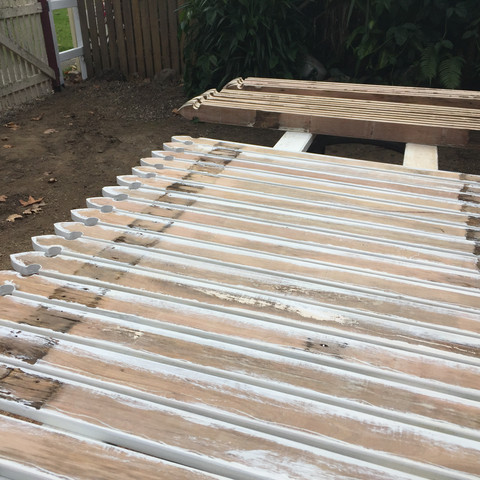
And now the fence restoration begins...


The first thing we did was to cut off all the rotted bottoms of the palings.


Well.... after another Reno committee meeting, we decided the only way to deal with the problem was to knock every paling off and totally rebuild the entire fence, which was definitely not what we had planned.
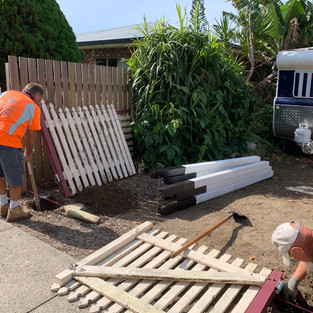
The boys were a tremendous help again, removing nails and smashing off the palings.
And the nails.....oh the nails. We took ages getting all the nails out of the rails after hammering the palings off.

The high pressure cleaner was put to good use yet again. Cleaning all the dirt, loose paint, lichen and rubbish off the palings.

After assessing the lovely lavender coloured fenceposts, we decided to replace them as there were too many rotted out on the bottom. The new ones won't rot now as I have painted them with special paint to stop that happening. They'll definitely see me out!


Painting time!!! First a coat of sealer to attempt to stop any tannin bleed and then a good exterior paint on top of that. Actually the fence has now had about 8 coats of paint.

Soooo many surfaces to paint! Never ending! A Marathon...


Lots and lots of nail holes to fill before the tedious painting process.


The big day has arrived for us to fix the palings onto the rails. Lots of measuring going on here.
Yay!!


Lovely afternoon light and we are feeling seriously rewarded for our efforts. God is good.


As you can tell by the following pics, we had completed the fence but still had the double gates to repair, rework and rebuild. Replaced some of the rotting timbers and totally rebuilt them. So they are like new ones now.


We are SUPER happy with the results of our never ending efforts to make this 'Sour's ear into a beautiful silk purse'.
LOVE...LOVE...LOVE...

Just a little reminder of what the place was like when we first got the keys. Click on the following link. https://piccolorose.wixsite.com/nest/post/day-one-and-the-gloves-are-on


Every time I check in I am completely blow away with the major changes you have accomplished. Lots of hard work but so rewarding I'm sure. This little cottage is coming back to life!! Wonderful to see. Love to you both. xx
How amazing. What a team you have! Hope to be able to see it in person before the end of the year!